Published by Enaam Siam on April 15, 2023 | Last updated on May 15, 2023
As a responsible homeowner, it is important to learn how to clean dryer vent on roof to make sure that your dryer vent is clean and free from debris.
Neglecting to clean your dryer vent can lead to serious problems such as fire hazards and reduced efficiency. While cleaning your dryer vent may seem like a daunting task, it is a relatively easy process that can be done in just a few steps.
In this CleanersAdvisor guide, we will guide you through the steps to how to clean dryer vent on roof.
What is a Dryer Vent?
A dryer vent is a duct or pipe that is used to expel hot and humid air from a clothes dryer to the outside of a building. The purpose of a dryer vent is to remove moisture and heat from the dryer, which can cause damage to the machine and pose a fire hazard if not properly vented.
A clogged or improperly installed dryer vent can lead to dryer malfunctions and can cause a fire, which is why it is important to regularly clean and maintain your dryer vent.
Throughout this CleanersAdvisor guide you will know everything about how to clean dryer vent on roof.
The Importance of Cleaning Your Dryer Vent
Before we dive into the steps on how to clean dryer vent on roof, let us first understand why it is important to clean your dryer vent regularly. Over time, lint and debris can accumulate in your dryer vent, causing it to clog.
When your dryer vent is clogged, the hot air produced by your dryer cannot escape. This can cause your dryer to overheat and potentially start a fire. In addition, a clogged dryer vent can also reduce the efficiency of your dryer, resulting in higher energy bills and longer drying times.
Step-by-Step Guide on How to Clean Dryer Vent on Roof
Cleaning your dryer vent on the roof is a simple process that can be a few steps. Here is a step-by-step guide on how to clean dryer vent on roof:
1. Turn off Your Dryer
Before you start cleaning your dryer vent on the roof, it is important to turn off your dryer and unplug it from the electrical outlet. This will ensure your safety and prevent any accidents from occurring.
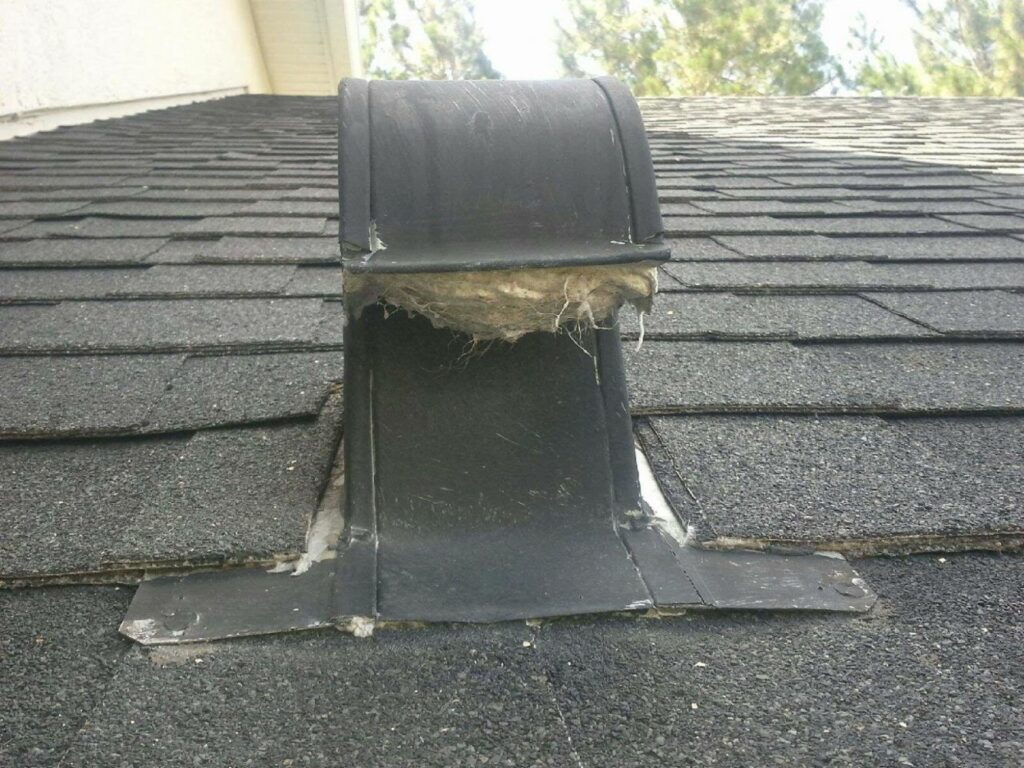
2. Locate Your Dryer Vent on the Roof
The next step is to locate your dryer vent on the roof. This is typically a small, round vent that is located on the roof of your home. Once you have located your dryer vent, you can proceed to the next step.
3. Remove the Vent Cover
Using a screwdriver, remove the vent cover from your dryer vent on the roof. This will allow you to access the inside of your dryer vent.
4. Clean the Inside of Your Dryer Vent
Using a vent cleaning brush, clean the inside of your dryer vent thoroughly. Be sure to remove any lint, debris, or other materials that may have accumulated inside your dryer vent. You can also use a vacuum cleaner to remove any remaining debris.
5. Reattach the Vent Cover
Once you have finished cleaning the inside of your dryer vent, reattach the vent cover using a screwdriver. This will ensure that your dryer vent is securely covered and prevent any debris from entering.
6. Turn On Your Dryer and Test Your Vent
After cleaning your dryer vent on the roof, turn on your dryer and test your vent to ensure that it is functioning properly. You should feel hot air coming out of your dryer vent and notice a significant improvement in the efficiency of your dryer.
Tips for Maintaining Your Dryer Vent
Cleaning your dryer vent on the roof is an important part of maintaining your dryer and ensuring its longevity. Here are a few tips to help you maintain your dryer vent:
1. Clean Your Dryer Vent Regularly
It is important to clean your dryer vent on a regular basis to prevent it from becoming clogged. You should clean your dryer vent at least once a year or more frequently if you use your dryer most of the time.
2. Install a Lint Trap
Installing a lint trap in your dryer vent can help prevent lint and debris from accumulating in your dryer vent. A lint trap is a small device that attaches to your dryer vent and catches lint and dirt.
3. Use the Correct Dryer Lint Material
When installing or replacing your dryer vent, it is essential to use the correct vent material. The most commonly used materials for dryer vents are aluminum and rigid metal. Avoid using plastic or vinyl, as they can easily become clogged and cause a fire hazard.
4. Keep the Area Around Your Dryer Clean
Keeping the area around your dryer clean can help prevent lint and debris from accumulating in your dryer vent. Be sure to clean the lint filter after every use and vacuum the area around your dryer regularly.
How to Clean Dryer Vent on Roof FAQs
Conclusion
Cleaning your dryer vent on the roof is an important part of maintenance. By following these outlined steps in this CleanersAdvisor guide, you can easily learn how to clean dryer vent on roof and ensure that it is functioning properly.
Remember to clean your dryer vent regularly and use the correct vent material to prevent clogging and fire hazards.
In this video, Adam Carr will teach you how to clean your dryer vent that goes up to the roof. The instructions will be the same even if your dryer vent duct goes to the outside wall. We will be using the Linteater Rotary Dryer Vent Cleaning System.
It is really important to clean your dryer vents on a fairly regular basis. Even if you clean the lint trap after every load, lint is still going to get past it and into the vent and it does not take long for it to clog. This can cause less dryer efficiency and possibly worse, a house fire.
![Criterion Dishwasher Reviews [According to 2023 Tests]](https://cleanersadvisor.com/wp-content/uploads/2023/03/Blog-Banner-for-Website-Content-41-350x190.png)
![Zline Dishwasher Reviews [According to 2023 Tests]](https://cleanersadvisor.com/wp-content/uploads/2023/03/Blog-Banner-for-Website-Content-42-350x190.png)

![GE Dishwasher Reviews [According to 2023 Tests]](https://cleanersadvisor.com/wp-content/uploads/2023/03/Blog-Banner-for-Website-Content-37-350x190.png)
![Miele Dishwasher Reviews [According to 2023 Tests]](https://cleanersadvisor.com/wp-content/uploads/2023/03/Blog-Banner-for-Website-Content-34-350x190.png)
![Cove Dishwasher Review [According to 2023 Tests]](https://cleanersadvisor.com/wp-content/uploads/2023/03/Blog-Banner-for-Website-Content-31-350x190.png)